Step by Step Guide to Simple Selenium WebDriver Framework in C#
There are two parts to this post. First, we will login to Gmail without using any framework. Later we will create simple Selenium WebDriver framework with C# for the same. Obviously you will not be able to login as we are using dummy username and password in this post. I am using Microsoft Visual Studio Professional 2015.
Without WebDriver Framework
Below is the code which navigates to Gmail. Then it clicks on the SIGN IN link, enters email address as username, clicks Next, enters password and finally clicks the Sign in button.

You can take a look at the SIGN IN link, field to enter email, Next button, field to enter password and Sign in button in the next 3 images (labeled as a, b & c).
a.

b.

c.

On the last step, after entering the password, when we are clicking on Sign in button, it gives an error saying something like "wrong password...", but we are good with it as we are not trying to login successfully. We are just entering all the required information and clicking on the Sign in button.
Using Simple WebDriver Framework
1. Start by creating a new unit test project (File (menu) -> New -> Project). Enter Solution name and Solution location.

2. In Solution Explorer, change the name of unit test from UnitTest1 to loginTest.
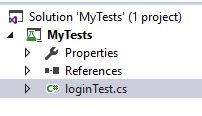
3. In loginTest.cs file, change the name of method TestMethod1() to EnterCredentialsForLogin().

4. Write below snippet of code in EnterCredentialsForLogin() method. This is how we will create our UI tests. You will notice that how easy it is to read and understand the below code like with loginPage.GoTo() we are navigating to the desired URL, then with loginPage.ClickSignInLink(), we are clicking on the Sign In link and so on. The code will show the red squiggly lines under the loginPage. Let it be as it is for the time being.

5. Right-click on Solution "MyTests" and add a new project of type Class Library. Name it UILibrary.

6. Change the name of Class1.cs under UILibrary to loginPage.cs

7. Type the code (as seen in the below image) in loginPage Class in loginPage.cs file.

Remember our EnterCredentialsForLogin() method in loginTest class. We are calling different methods for example GoTo(), ClickSignInLink() like loginPage.GoTo(), loginPage.ClickSingInLink() and so on in it. We have written these methods in loginPage class as can be seen above.
GoTo() navigates to provided URL.
In ClickSignInLink() method we are clicking on the SignIn link after finding it using CSS selector.
In EnterUserName() method we are waiting until the element is visible and then entering email address in it after finding it using Id.
In ClickNext() method we are clicking the Next button.
In EnterPassword() method, similar to EnterUserName() method, we are first waiting until the element is visible and then entering the password in it after finding it.
With ClickSignInButton() method we are just clicking the SignIn button.
8. In UILibrary add references for Selenium WebDriver and Selenium WebDriver Support.

9. Also add namespace "using OpenQA.Selenium.Support.UI;" & "using OpenQA.Selenium;" in loginPage.cs.
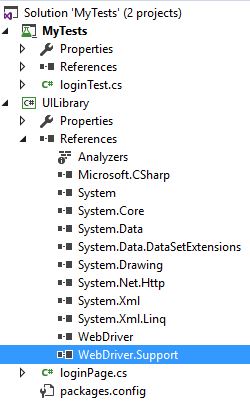
10. Add a new CS file with name Driver.cs under UILibrary.

11. After adding the Driver.cs file, Solution Explorer looks like below.

12. Add below code in Driver.cs file. Add two namespaces "using OpenQA.Selenium;" & "using OpenQA.Selenium.Firefox;". Also be sure to make class "Driver" public.

We have kept the class Driver as separate and are initializing the Firefox driver in it. This is being used by our methods written in loginPage class in loginPage.cs file. Suppose in future we need to expand our framework and add one more page like inboxPage and write some methods in it also. Then that new inboxPage can still use the Driver class in the Driver.cs file. So this makes sense to keep our Driver class separate and let others use it.
13a. Add reference to UILibrary for loginTests. In loginTest.cs, add namespace "using UILibrary".

13b.

15. In loginTest.cs also add testinitialize method so the final loginTest looks like as shown below.

Now run the EnterCredentialsForLogin() method and see the framework working.
When the framework is run the control first goes to init() in loginTests.cs. New Firefox driver is initialized here. [TestInitialize] attribute contains code which we need to run before execution of each test. Then EnterCredentailsForLogin() method is run. In the first line of this method GoTo() method of loginPage class is run which navigates to the desired URL. Then ClickSignInLink() method of the loginPage class is run which clicks on the Sign In link and so on.